How to Export Videos Without Losing Quality | RemotionAI Blog
how to export videos · video export settings · video codecs · social media video specs · video rendering tips
Learn how to export videos the right way. Covers formats, codecs, bitrate, platform presets, and practical workflows for TikTok, Reels, and YouTube.
You've probably done this before. Finish the edit, hit Export, pick MP4, upload, and move on. Then the file looks soft on Instagram, stutters on one phone, crops badly on Shorts, or takes forever to upload only to get crushed by the platform anyway.
That's why people keep searching for how to export videos and still end up rerendering the same clip three times. The problem usually isn't editing. It's that most export guides treat every destination like it wants the same file, and real publishing workflows don't work that way.
Why Export Settings Matter
Export settings decide whether the file that leaves your editor survives the trip to the platform with its detail, motion, and framing intact.
A preset can be good enough for a draft, an internal review, or a quick handoff. It falls apart faster when the same clip needs to run on TikTok, Instagram Reels, YouTube Shorts, a website embed, and a client's old Android phone. Each destination handles compression, scaling, and playback a little differently, so the export that looks fine in one place can break down in another.
That is why one universal preset only gets you part of the way. Real publishing work usually needs two paths. One clean, broadly compatible file for speed, and one destination-tuned export when the placement matters enough to justify the extra render.
The few settings that move the result
You do not need to master every checkbox in the export panel. You do need to control the handful of settings that change what viewers notice.
- Resolution: Match the frame to the destination so the platform is not forced to resize or pad the image.
- Frame rate: Keep it aligned with the source timeline unless you have a clear reason to convert it.
- Codec and container: For broad compatibility, MP4 with H.264 remains the safe baseline.
- Bitrate: Spend enough data to hold detail and motion, but not so much that you create a heavy upload the platform will crush anyway.
Adobe still reflects this baseline in professional export workflows. Premiere's export workflow documentation recommends H.264 for most online videos.
Practical rule: Don't optimize for the settings panel. Optimize for where the file will be watched.
One more distinction matters because it causes a lot of bad troubleshooting. Rendering and exporting are related, but they are not the same step. If you want a clean explanation before building presets, read this guide on what it means to render a video.
Why MP4 keeps winning
MP4 stays popular for a simple reason. It plays almost everywhere without friction.
That matters more than editor debates about ideal formats. If a creator needs one file that uploads cleanly, opens on older phones, previews in common apps, and does not trigger support emails from a client, MP4 with H.264 is still the format I would start with. It is not always the smallest file or the highest-end option, but it is the one that causes the fewest delivery problems across social, web, and mobile.
The Core Settings You Need to Understand
The export panel throws a lot at you, but the mental model is smaller than it looks. Learn five terms and most of the clutter starts making sense.
Container and codec
The container is the file wrapper. MP4, MOV, and MKV are containers.
The codec is the compression method inside that wrapper. H.264 is the one you should care about first, because it stays widely compatible across social, web, and mobile playback. If you're sending a file to another editor, you might choose something heavier and less compressed for handoff. If you're optimizing for a specific web destination, another codec can make sense. But for everyday publishing, MP4 with H.264 is still the safe answer.
Resolution, frame rate, and bitrate
Resolution is the pixel grid. A vertical clip for short-form social usually needs a different frame shape than a horizontal YouTube video or website embed.
Frame rate is the number of frames shown per second. Adobe's guidance is straightforward: match export frame rate to the source timeline and keep resolution at the highest captured level. A lot of common export tables converge on H.264 MP4 at 1080p with 24 to 30 fps using roughly 8 to 12 Mbps target bitrate, while 60 fps versions typically need about 12 to 16 Mbps to avoid visible artifacts, according to Adobe-aligned basic video settings guidance.
If motion looked smooth in the edit and starts feeling odd after export, frame-rate conversion is one of the first things to check.
Bitrate is where people overcorrect. They crank it high because “more must be better.” Not always. If the destination will recompress the file anyway, excessive bitrate mostly buys you bigger uploads and slower handoff.
Audio settings people ignore until it's too late
Audio failures are less visible in the settings panel and more obvious after upload. For social exports, the dependable choice is AAC audio, usually with 48 kHz where supported, and a sane bitrate range rather than the lowest possible setting. The practical guidance for social short-form exports also points to 128 to 256 kbps AAC and warns against color and compression mistakes that make videos feel cheap before anyone notices the picture itself, as summarized in this social export guide.
A simple way to think about exports:
- Use MP4 when compatibility matters most.
- Use H.264 when the file needs to play almost anywhere.
- Match frame rate to your timeline instead of “upgrading” it at export.
- Keep source resolution instead of upscaling footage that can't gain detail back.
- Use AAC audio so the file behaves predictably on common platforms.
Choosing Between Universal and Destination-Tuned Exports
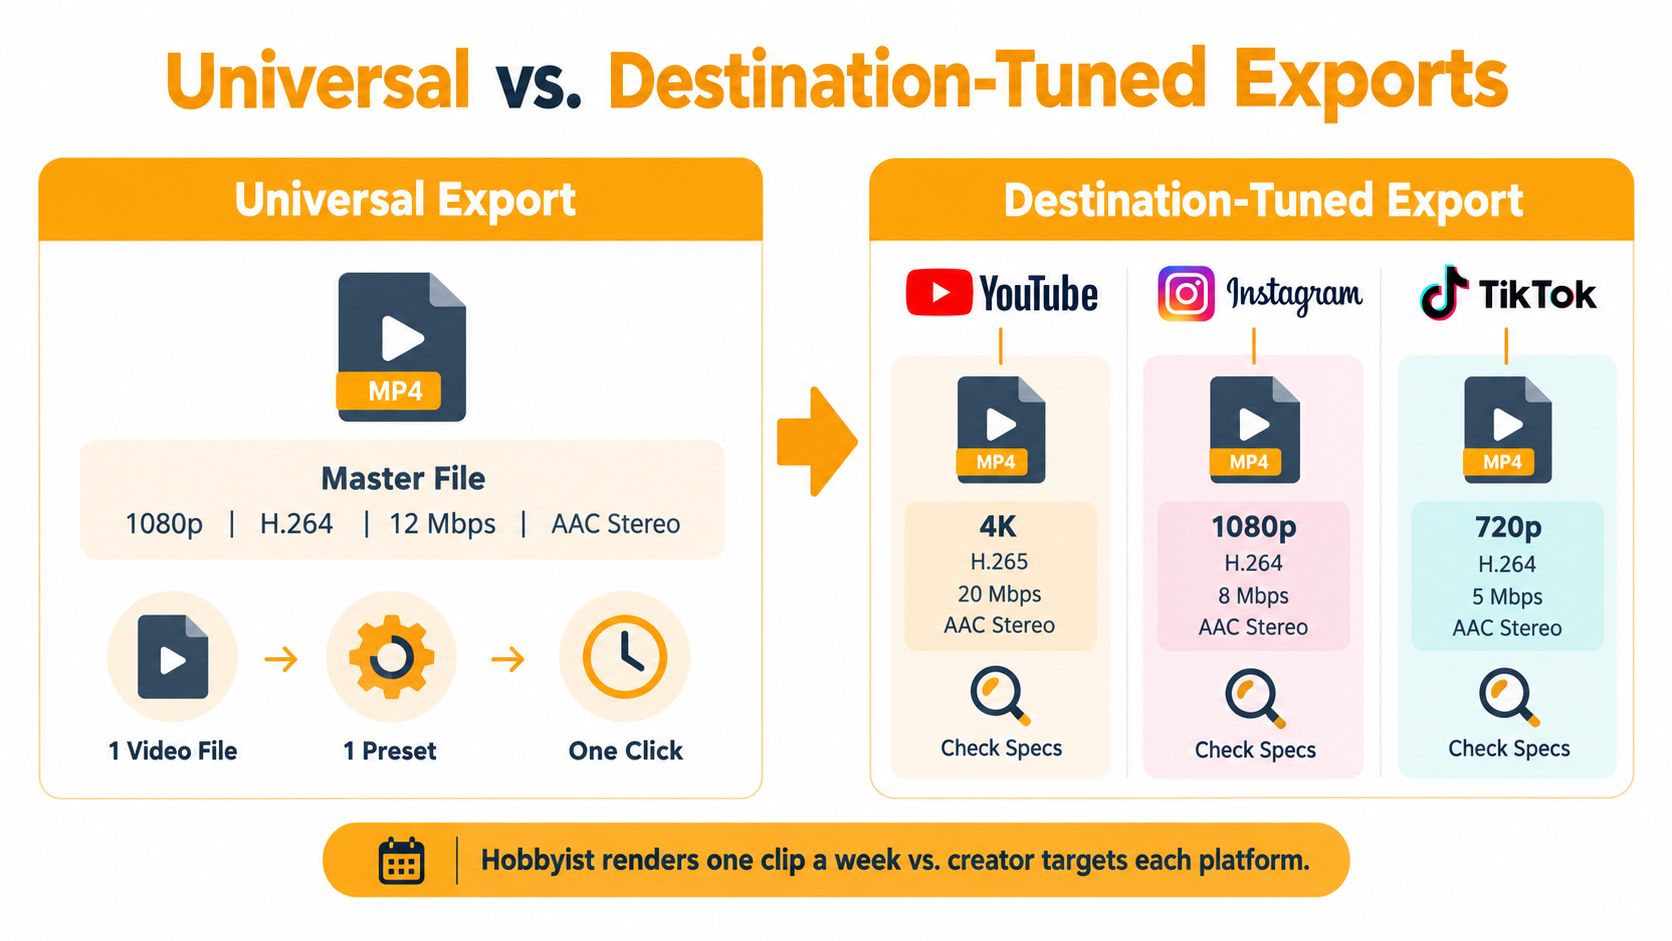
Most advice on how to export videos assumes there's one ideal preset. In practice, there are two useful workflows.
The first is a universal export. One clean file, broadly compatible, easy to archive, easy to upload. The second is destination-tuned export, where TikTok, Reels, and Shorts each get their own preset because the crop, bitrate tolerance, and playback context differ.
When one file is enough
A universal file is fine when your output volume is low and your goal is speed. One export, one upload routine, fewer chances to mislabel files or render the wrong variant.
A practical version of that universal file is 1080p, H.264, MP4, AAC stereo. It won't win every compression fight on every platform, but it's stable.
When separate presets start paying off
The minute you publish constantly, the trade-off changes. You're no longer just exporting one clip. You're repurposing edits, swapping captions, and shipping variants to different destinations. That's where platform-tuned presets stop being fussy and start being efficient.
The gap in a lot of current guides is exactly this point. They still default to MP4, H.264, and matched frame rate, but they rarely explain when to stay universal and when to split into platform versions, even though modern workflows increasingly rely on queues, multiple presets, and repurposed exports, as noted in this discussion of export settings across YouTube, Instagram, and TikTok workflows.
A creator posting occasionally needs reliability. A team posting constantly needs repeatability.
Platform Export Recipes and a RemotionAI Walkthrough
A clip that looks clean on your timeline can fall apart after upload. Captions start to shimmer, gradients posterize, or the platform recompresses motion into mush. That is why platform recipes matter. Not because every app needs a magical preset, but because you need a reliable default and a clear point where it makes sense to split into destination-specific exports.
For short-form social, the practical baseline is still 1080 × 1920 in 9:16. TikTok recommends that setup for organic posts in its platform spec guide. Instagram Reels usually targets the same frame, and current guides note a 4 GB maximum file size plus length limits that vary by account status in this Instagram Reels size guide. YouTube Shorts fits the same vertical frame, which is why many editors keep one vertical master and only branch into separate exports when a platform, campaign, or ad spec gives them a reason to.
Export presets that work in practice
| Setting | TikTok | Instagram Reels | YouTube Shorts |
|---|---|---|---|
| Format | MP4 | MP4 | MP4 |
| Codec | H.264 | H.264 | H.264 |
| Resolution | 1080 × 1920 | 1080 × 1920 | 1080 × 1920 |
| Aspect ratio | 9:16 | 9:16 | 9:16 |
| Frame rate | Match source, commonly 30 fps | Match source, commonly 30 fps | Match source, commonly 30 fps |
| Audio | AAC | AAC | AAC |
| Bitrate | Around 10 to 15 Mbps is a practical social range | Around 10 to 15 Mbps is a practical social range | Around 10 to 15 Mbps is a practical social range |
| Color | Rec.709 | Rec.709 | Rec.709 |
That table is the shared baseline, not a rule you force onto every job.
If the clip is headed to three organic platforms fast, one export is usually enough. If it is also going into paid placements, old Android devices, or a client approval chain that keeps asking for lighter files, make a second version on purpose. I usually keep the social master as full-quality H.264, then create a lighter fallback only when upload speed, device playback, or ad platform limits justify it.
Paid social is where specs get more particular. I keep this breakdown of video codec sizes for Facebook Ads nearby when I need to adapt an organic cut into ad-ready deliverables without guessing.
A practical export flow in RemotionAI
RemotionAI is useful for teams that want the finished MP4 and the editable source side by side. That matters when the first export is not the last export, which is common once captions change, legal asks for a swap, or a platform upload exposes compression problems you did not see locally.
A simple working routine:
- Open the project and watch the full piece once at normal speed.
- Check failure points such as last-frame flashes, text safe margins, subtitle timing, and any thin lines that may shimmer after recompression.
- Render to MP4 with H.264 video and AAC audio.
- Set output by destination. Use the vertical master for general short-form. Create a lighter duplicate if the target device or upload workflow struggles with the first file.
- Download the .mp4 and test it outside the editor on your phone before sending it anywhere.
- Keep the .tsx source with the export so revisions stay quick and reversible.
If you want the click-by-click render step, this guide on how to render a video shows the process clearly.
Naming, Compression, and a Smart Batch Workflow
Bad exports waste time. Bad file naming wastes whole afternoons.
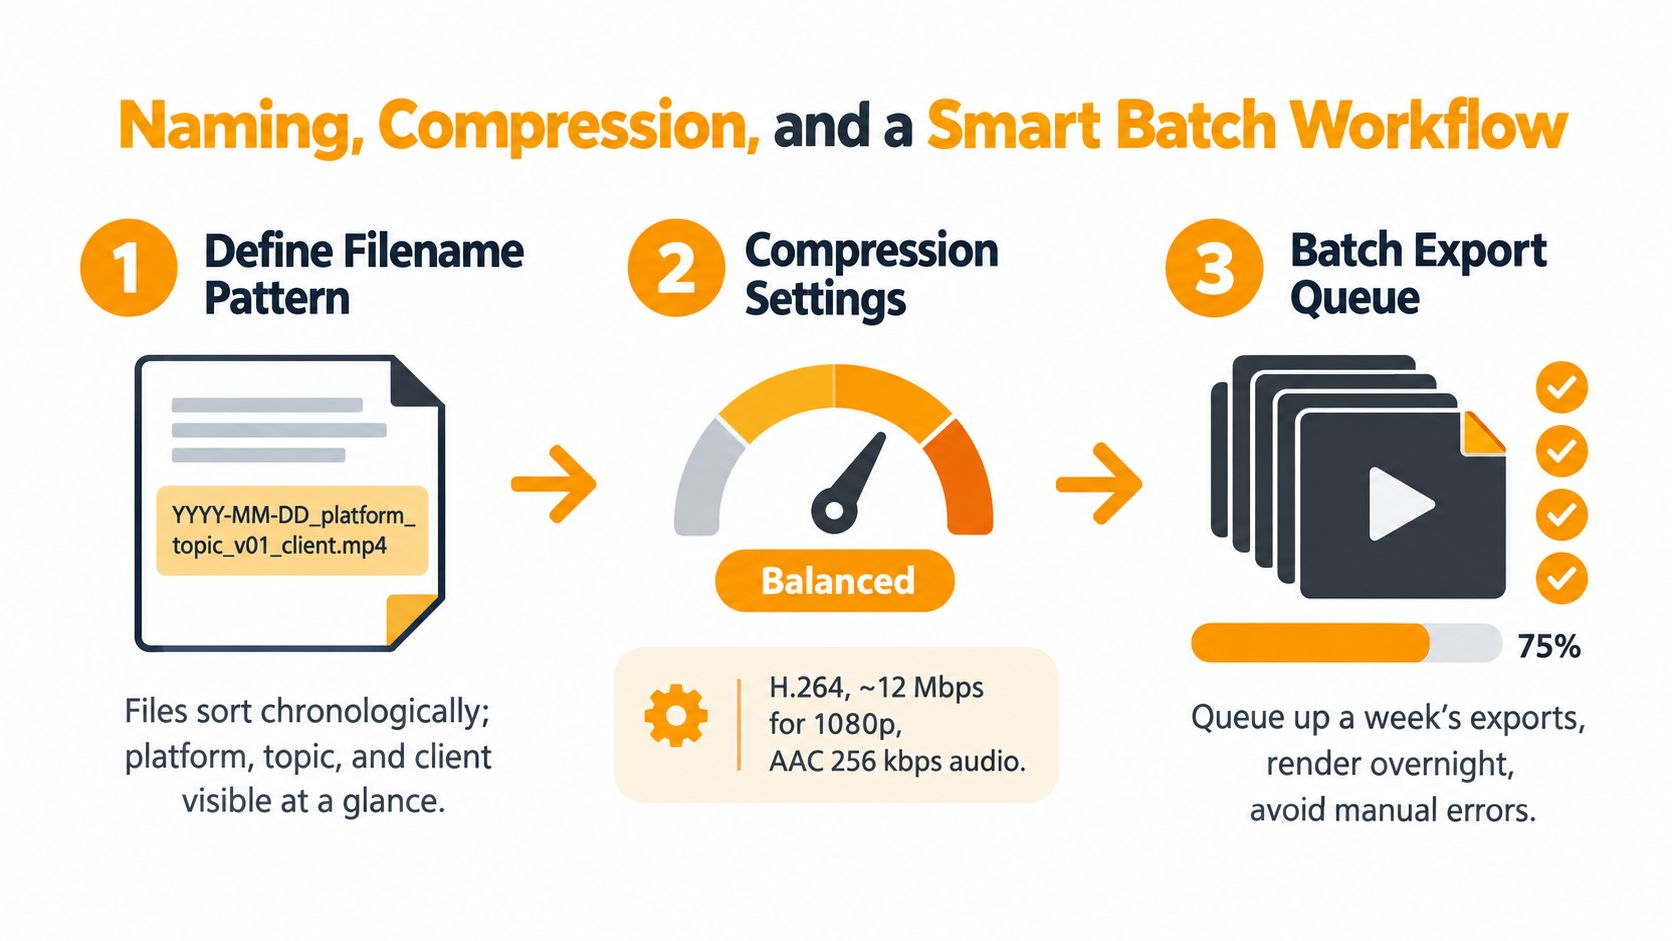
When you're handling a week's worth of clips, the cleanest system is one folder per asset, with both the final export and the editable source sitting together. That sounds obvious until you've got duplicate filenames in Downloads and three versions called final, final2, and final-really-final.
A filename pattern that holds up
Use a structure like YYYY-MM-DD_platform_topic_v01_client.mp4.
That pattern does three useful things at once:
- Sorts by date so campaign history stays readable.
- Shows destination fast when you're scanning finder icons or upload queues.
- Tracks versioning without needing a separate note to remember which export changed.
A batch routine that doesn't create chaos
My preferred flow is simple and boring. That's the point.
- Render first: Export the master MP4 from your editing or rendering tool.
- Store the source: Keep the matching project file or source code beside the export, not somewhere else.
- Compress only if needed: If the upload target is picky or the file is heavier than it needs to be, run a final compression pass.
- Queue uploads after naming: Don't upload unnamed exports and promise yourself you'll fix them later.
For file-size cleanup, a second-pass compression tool can help. If you regularly deal with bulky MOV exports before converting them for delivery, this guide on how to reduce file size of MOV is a useful companion.
The goal isn't a perfect archive. It's a folder structure that lets you find, revise, and reupload a clip without guessing.
Troubleshooting Exports That Go Wrong
Most failed exports don't come from mysterious codec bugs. They come from basic bottlenecks people check too late.
The common assumption is that if settings look right, the export should work. In reality, storage, missing media, and device limits usually break the process first. One troubleshooting source explicitly recommends checking free storage and missing clips, and also notes that having roughly 3× the expected file size available can prevent failed exports, along with testing a short section first in this guide to common video export errors.
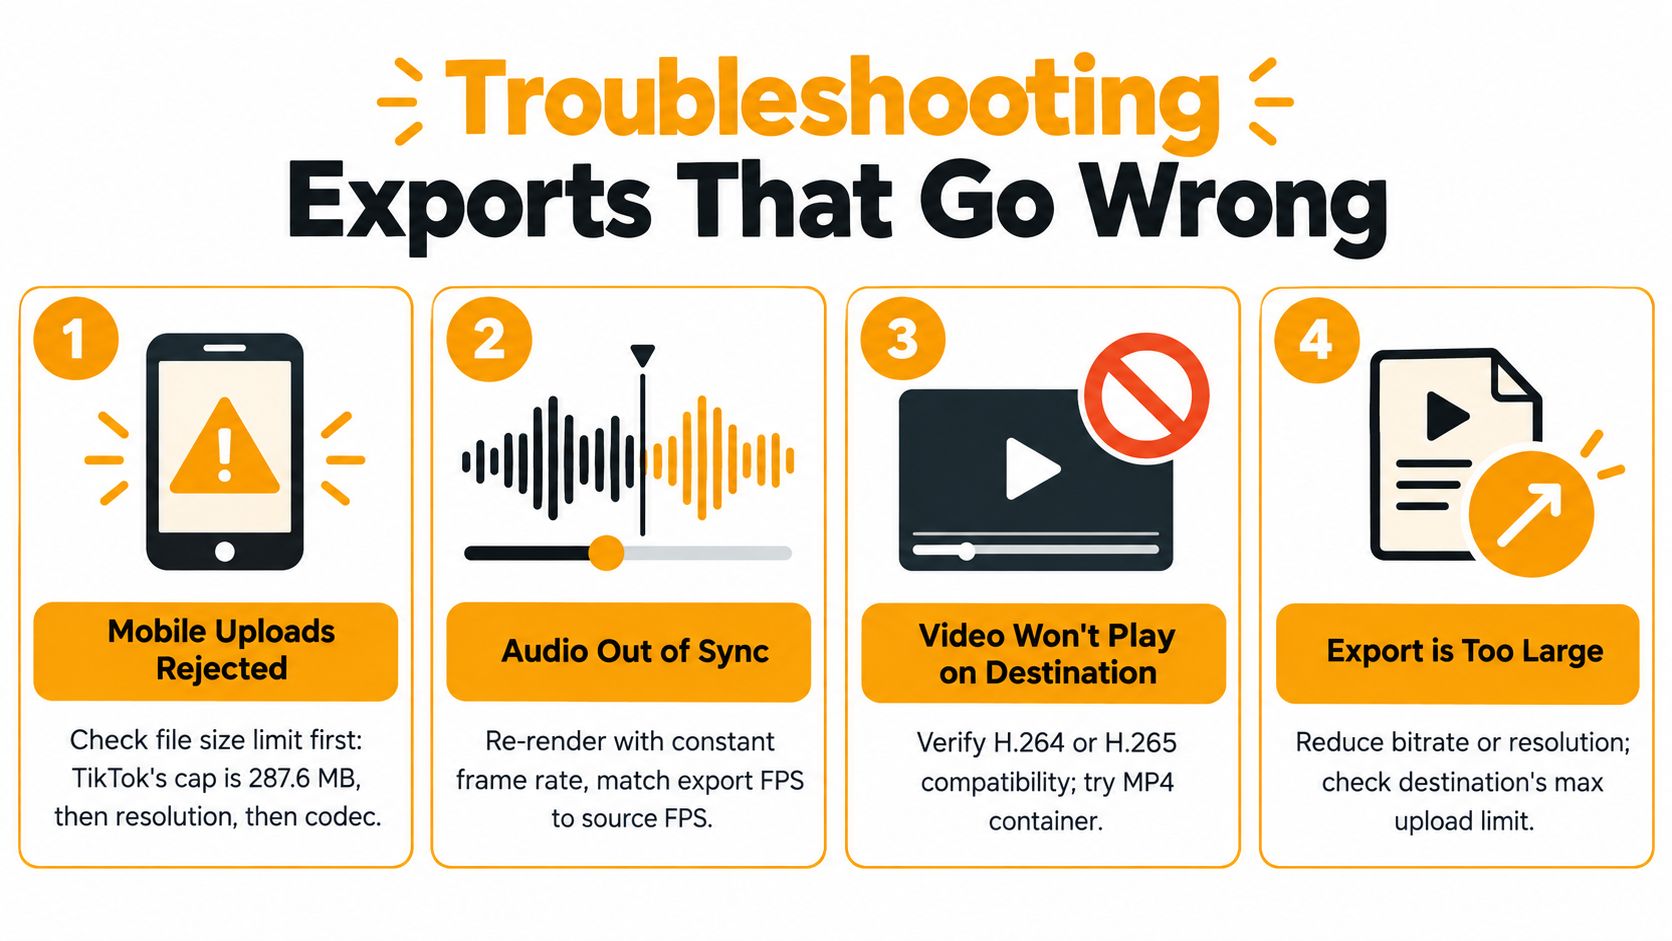
The fastest checks for common failures
- Upload rejected on mobile: Check file size first. Then confirm the resolution fits the platform and the file uses a common codec and container.
- Audio looks out of sync after export: Check whether your source clips came from mixed devices or screen captures. If motion and speech drift apart, rerender with consistent frame-rate handling and verify the timeline settings before blaming the platform.
- Video looks blocky in dark scenes: This usually points to compression pressure. Raise bitrate within a sensible range and avoid overcompressing fine gradients.
- Export crashes on weaker hardware: Test a shorter section of the timeline, reduce preview burden while editing, and make sure the machine has enough free storage before rerunning the full export.
- Export won't start at all: Check for missing source files, broken references, or a composition length mismatch.
What to check before changing settings
Start with the environment, not the codec menu.
If a file won't export on a phone but works on desktop, the limitation is often the device itself. If the file exports but uploads badly, the limitation is usually the delivery target. Those are different problems, and they need different fixes.
Check storage first, source integrity second, destination limits third. Most export issues reveal themselves in that order.
Your Pre-Render Checklist
A good export workflow isn't one heroic save at the end. It's a repeatable minute of discipline before you click Render.
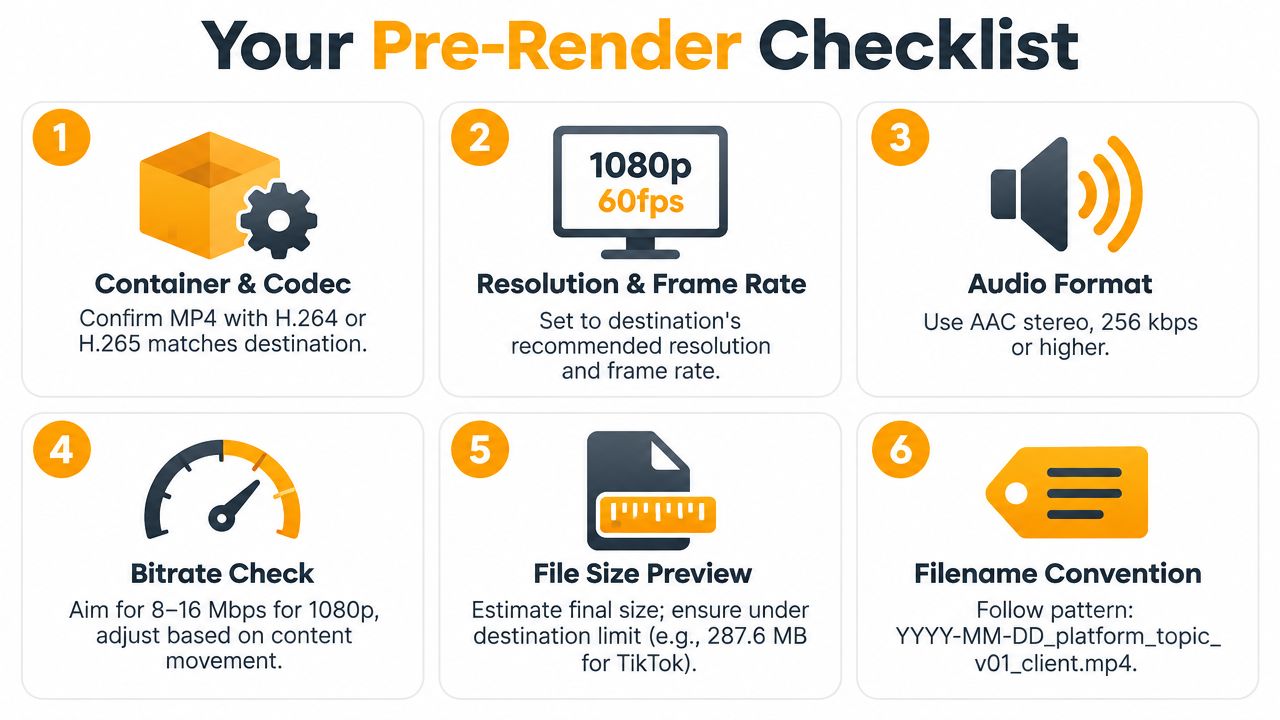
Use this checklist every time:
- Container and codec: Confirm the destination wants a broadly compatible file, usually MP4 with H.264.
- Resolution and frame rate: Match the platform shape and keep frame rate aligned to the source timeline.
- Bitrate: Keep it high enough for clean motion and text, but not so high that you're uploading waste.
- Audio: Use AAC and verify the sample rate your platform supports.
- Quick preview: Watch a short section before the full export to catch glitches, caption offsets, or missing media.
- Filename: Save with a date, platform, topic, and version so the file is readable later.
That habit prevents most rerenders, upload rejections, and “why does this one look worse than the last one?” moments. Exporting isn't separate from editing. It's the last editorial decision you make before the audience sees the work.
If you want a faster way to get from idea to platform-ready MP4, RemotionAI lets you generate videos from prompts, preview the underlying Remotion output, and render downloadable files you can tune for TikTok, Reels, or Shorts. It's a practical fit when you need editable source, repeatable exports, and fewer last-minute rebuilds.