Instagram Reel Format Guide | RemotionAI Blog
instagram reel format · reel dimensions · reel specs · vertical video · reel best practices
Instagram Reel format guide with specs, ratios, durations, codecs, and best practices for better reach and engagement in 2026.
“Shoot vertical, export at 1080 × 1920, keep it short.” That's the standard Instagram Reel format advice, and it's incomplete. The canvas matters, but so do the feed preview crop, safe zones, upload method, viewing context, and the job your video needs to perform.
Reels launched globally on August 5, 2020, as 15-second clips, then expanded to support videos up to 3 minutes. Outfame's history of Instagram Reels documents that shift from a lightweight short-video feature into a core Instagram product. By 2026, Meta-reported usage was described as more than 200 billion daily plays across Instagram and Facebook combined, with 17.6 million hours of daily viewing time, according to Upgrow's 2026 Reels data summary.
Why the Instagram Reel Format Decision Actually Matters
The wrong format can make a strong idea feel broken before the viewer reaches the hook. A product demo may technically upload, but cropping can remove the product. A headline placed near the bottom can disappear behind controls. A soft first frame can make the video look careless in the exact moment someone decides whether to keep watching.
Format is part of distribution, not merely an export checkbox. Reels recommendation systems respond to viewing behavior, including watch time, completion, replays, saves, and shares. The frame influences whether people understand the scene quickly, while duration determines how much attention the story asks for.
The distinction between a Reel and a Story also matters because the two formats serve different viewing contexts. iHatePosting's Reel and Story guide is useful when planning whether a video should pursue discovery or communicate with an existing audience.
Practical rule: Choose the viewing experience before you choose the export preset.
A native vertical master gives you control over framing, text, motion, and sound. Repurposing can work, but only when the edit is rebuilt for the mobile screen rather than squeezed into it.
Core Reel Specs Every Creator Should Know
The dependable baseline is 9:16 vertical at 1080 × 1920 pixels. That ratio fills the full-screen Reel viewer without letterboxing, and Hootsuite's Instagram video size guidance supports it as the standard production canvas.
Instagram can show Reels in the feed with a 4:5 crop, so a composition that looks perfect full-screen may lose text or visual detail in the preview. Instapage's Reel dimensions guide explains why the feed view needs its own framing check.
| Spec | Recommended Value | Why It Matters |
|---|---|---|
| Canvas | 1080 × 1920 pixels | Fills the mobile viewport cleanly |
| Aspect ratio | 9:16 | Preserves the intended vertical composition |
| Feed check | Center-safe composition | Protects key visuals from preview cropping |
| Delivery file | MP4 | Fits a common social video workflow |
For teams publishing at scale, an Instagram Reels automation API can help connect rendering and scheduling workflows, but automation won't repair a poorly composed master. Check the practical production details in this Instagram Reels resolution guide before you batch-export.
Choosing the Right Reel Length for Your Goal
The three-minute upload ceiling is not a target. Longer Reels can now qualify for Explore recommendations, according to Metricool's Instagram Reels guide, but eligibility does not make extra runtime useful.
Choose length from the viewer's job. A short cut suits one visual idea, a reaction, a product reveal, or a repeatable hook. A medium edit gives a tutorial or explanation room for context and payoff. A longer video earns its runtime only when the subject needs deeper treatment and the opening gives viewers a reason to continue.
For discovery, keep the edit under 90 seconds where the idea allows it. Metricool's guide associates shorter Reels with stronger non-follower distribution, while watch time and shares also affect reach. That creates a practical trade-off: short videos can widen initial discovery, while longer cuts can support depth when retention holds.
Review the feed preview before publishing. A strong full-screen opening can lose its key visual in a cropped feed view, so place the first payoff where both viewing contexts can read it.
Codec, Bitrate, and Export Settings
Use H.264 video, AAC audio, and an MP4 container as the safe default for most Reels. This combination is broadly compatible and gives Instagram a predictable file to process.
I'd avoid exporting a heavy master just because the editing software allows it. Instagram will transcode the upload, so a clean, correctly sized file is more useful than a giant file that spends longer uploading and still gets recompressed. Keep frame rates consistent from source to timeline, and inspect variable-frame-rate phone footage before editing.
| Setting | Recommended Value | Why It Matters |
|---|---|---|
| Codec | H.264 | Reliable compatibility |
| Container | MP4 | Standard social delivery format |
| Audio | AAC | Consistent playback on mobile |
| Frame rate | Match the source and edit | Prevents cadence problems |
| Color | SDR workflow when appropriate | Reduces unexpected color shifts |
For a practical export workflow, use this guide to exporting videos. Test the finished file on a phone, not only in a desktop player. Compression flaws, audio harshness, and tiny captions become obvious at the actual viewing size.
Safe Zones, Captions, and On-Screen Text
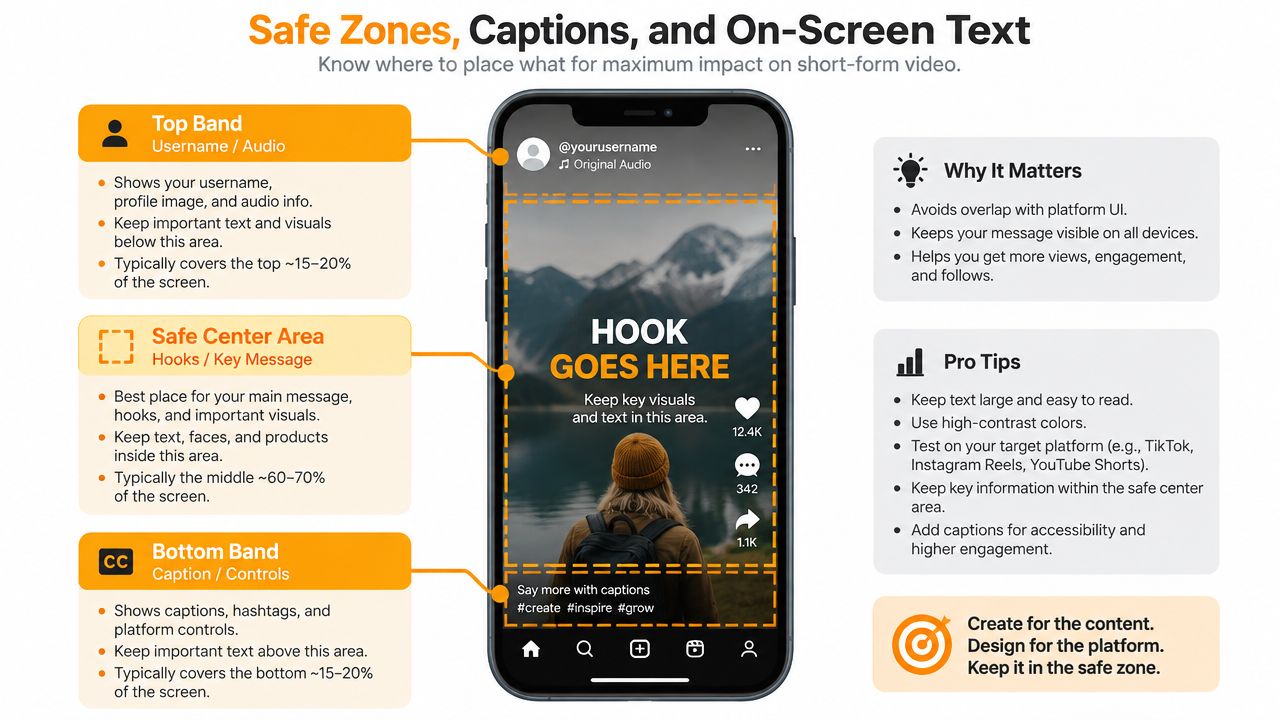
The full-screen player reserves visual space for interface elements. Usernames and audio information occupy the upper area, while captions, controls, and interaction buttons compete for attention near the bottom. Keep the hook and essential message in the central portion of the frame, where they're more likely to remain visible in full-screen, feed, Explore, and profile previews.
Don't place a logo or CTA against the extreme edges. A centered title can survive several placements, while a low caption may be hidden or cropped before the viewer reads it.
Auto-captions need contrast, breathing room, and short phrases. Use a solid or subtly blurred background when footage is busy, and preview every line on a phone. The first visual statement should arrive immediately, not after a logo animation or a slow establishing shot.
For a deeper comparison of layouts, use this reference on Instagram video aspect ratios. The key test is simple: pause the Reel at its opening frame and ask whether the message remains readable without opening the caption.
Repurposing Horizontal and Mixed Footage
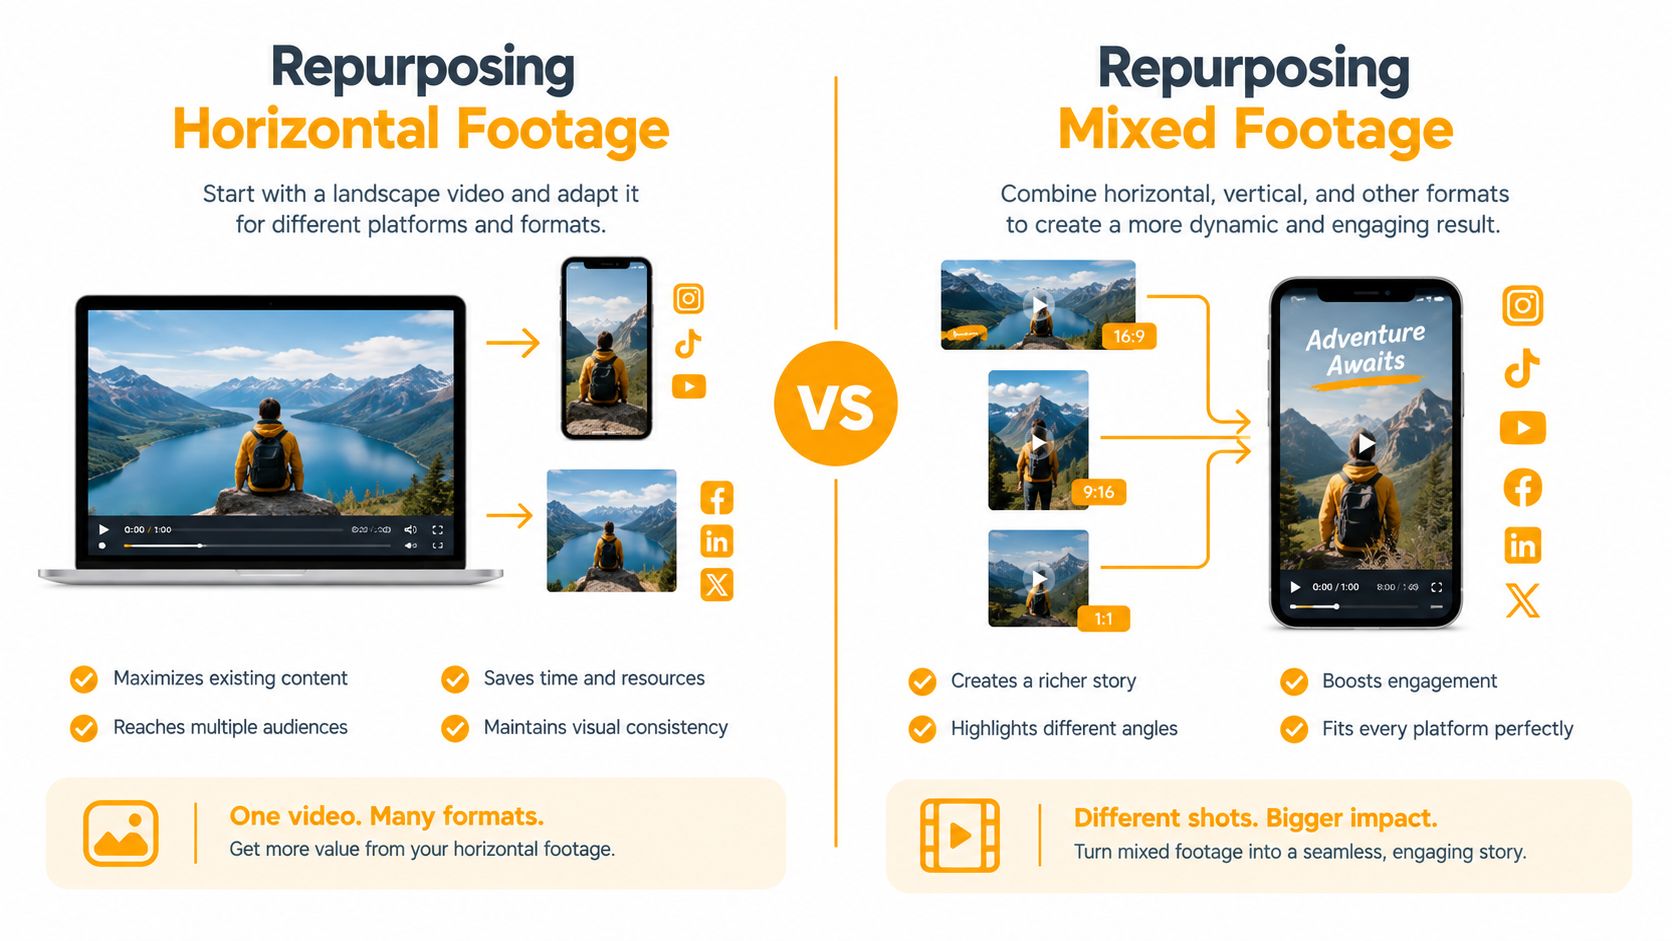
Horizontal footage isn't useless, but it needs a deliberate conversion strategy.
Pillarboxing with a blurred background preserves the full cinematic frame and works well for wide B-roll. The trade-off is unused space, so add a strong vertical title or supporting graphic without covering the original subject.
Center-cropping is effective for a solo talking head when the speaker stays near the middle. It fails quickly with group scenes, product demonstrations, or movement that travels across the frame.
Manual reframing with keyframes gives the best control for action and multi-subject scenes. Premiere Pro, DaVinci Resolve, and CapCut can all support workflows that track or reposition the subject, but automated reframing still needs a human review.
If you need to change video aspect ratio, check the result scene by scene. Don't upscale a small horizontal master to fill the vertical canvas and assume resolution will recover. When a Reel is planned in advance, shoot a separate vertical master.
Before export, reconcile:
- Frame rate: Match clips to the timeline.
- Color: Normalize mismatched grades and exposure.
- Audio: Balance dialogue, music, and ambient sound.
- Framing: Keep the subject clear through every crop.
How Format Choices Affect Reach and Engagement
Technical decisions become performance decisions once viewers start scrolling. A 9:16 frame occupies the screen as intended, so the subject reads faster than it does inside a letterboxed layout. A correctly sized 1080 × 1920 master also gives compression more usable detail than an undersized file.
Duration changes the type of engagement you can earn. Short cuts can generate efficient repeat viewing and broad discovery, while longer edits can create more reasons to save or share when they teach, demonstrate, or explain something substantial. Neither outcome comes from duration alone. The opening, pacing, and payoff determine whether the chosen length feels justified.
| Format Lever | Metric Affected | Why It Matters |
|---|---|---|
| Native 9:16 framing | Watch time and completion | Removes dead space and clarifies the subject |
| Clear central text | Comprehension and shares | Keeps the message visible across placements |
| Short focused edit | Replays and discovery | Makes the idea easy to finish |
| Longer structured edit | Saves and deeper viewing | Supports tutorials and explanations |
| Clean audio and export | Retention | Prevents avoidable quality-related exits |
A technically valid Reel can still fail if the first frame is blurry, the hook sits under an overlay, or the CTA disappears in the feed crop. Distribution starts with a file people can understand immediately.
Quick Reference Checklist for Every Reel
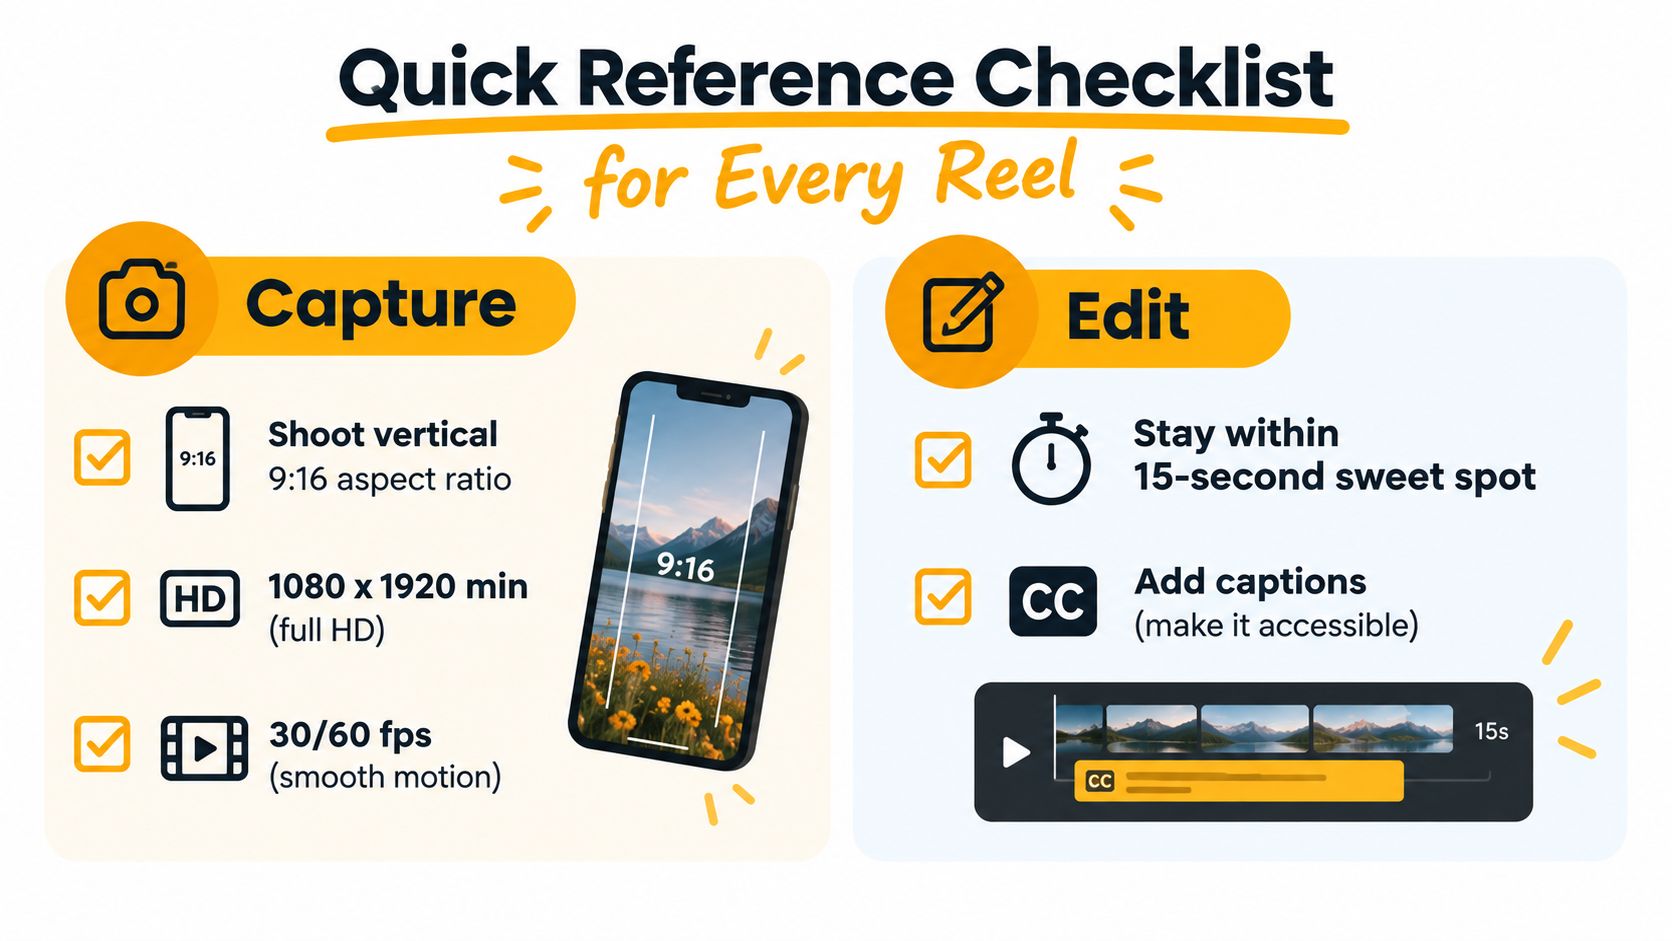
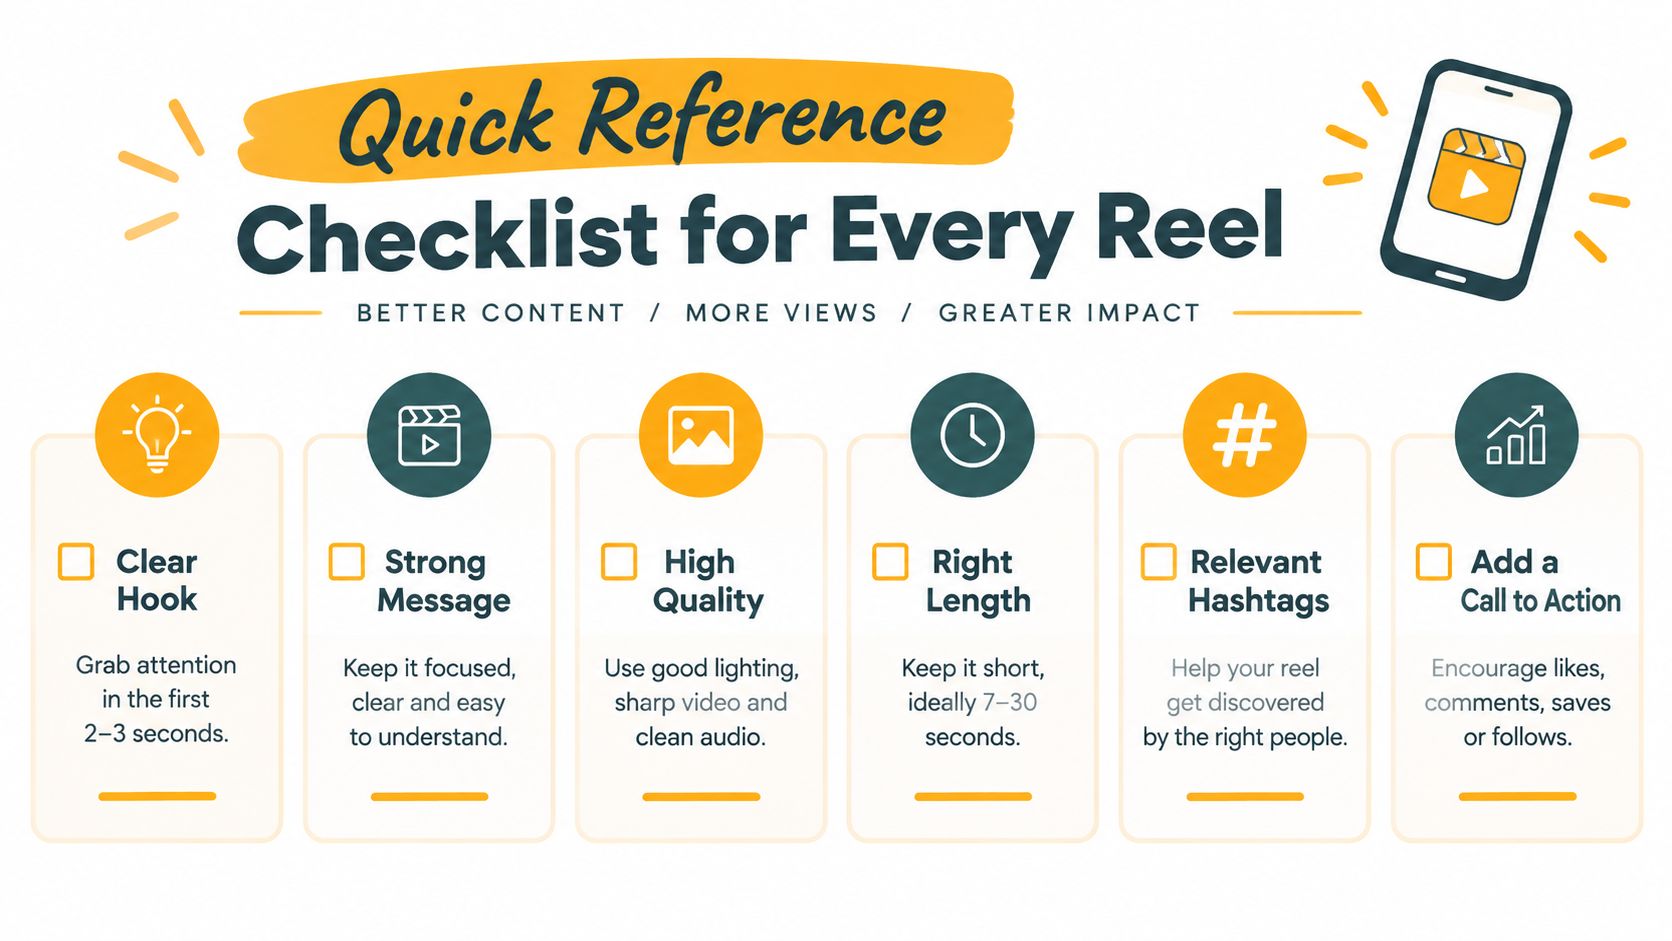
Use these lines as a pre-export checklist:
- Capture: Shoot the primary master vertically at 9:16.
- Canvas: Set the sequence to 1080 × 1920 pixels.
- Motion: Choose a frame rate that matches the footage and movement.
- Reach: Keep the edit concise when one idea can carry the video.
- Depth: Extend the runtime only when the tutorial or story needs it.
- Export: Deliver an H.264 MP4 with AAC audio.
- Framing: Keep the subject and essential text in the central safe area.
- Captions: Add readable subtitles that work with sound off.
- Hook: Put the core promise in the opening moment.
- Preview: Check the Reel in both full-screen playback and the feed crop.
- Upload: Confirm the aspect ratio, audio sync, and absence of black bars.
- Review: Watch the final file on a phone before publishing.
RemotionAI turns plain-language concepts into platform-ready vertical videos with generated scenes, voiceovers, synchronized audio, captions, and editable Remotion code. Use RemotionAI to create a 9:16 Reel master, preview the composition, and refine text placement before rendering the final MP4.